/rdlab HPC service manual
Introduction
The CS department High Performance Computing system (HPC) is running a queue manager environment that collects all the user requests / jobs. Then, the queue scheduler sorts and prioritizes every user task using several defined criteria (user quota, estimated execution time, RAM, CPU cores…).
When a gap that fits the job is available in the HPC system, the user request is transferred to an execution node and controlled by the queue system. If the user process tries to user more resources (RAM, time…) the queue system will kill the job to ensure system stability.
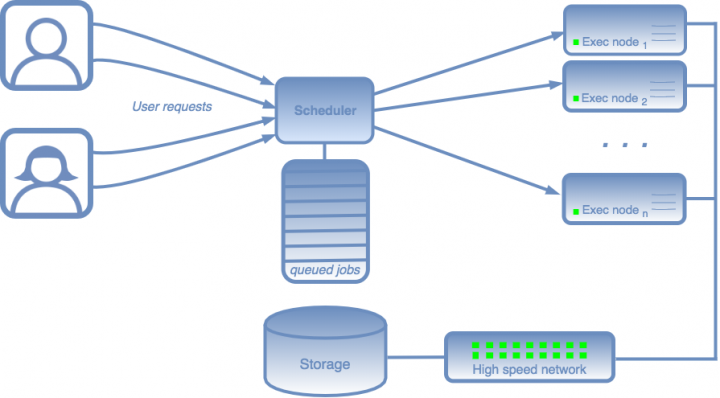
The /rdlab HPC system is currently using:
Warning: In a common server/laptop/computer the user just executes whatever he wants directly. In an HPC environment, all user requests/processes/jobs must be queued and controlled through the queue system.
Our HPC system groups all the execution nodes through several specific queues based on time criteria or specific hardware.
The user available queues are:
| Queue name (partition) | Purpose and limits |
|---|---|
| short | execution time < 1 day |
| medium | execution time < 1 week |
| long | execution time unlimited |
| gpu | execution nodes with GPU |
Warning: Other queues are reserved for internal or specific services and are only available to HPC administrators.
Access and configuration
Our HPC environment is only accesible through the Secure SHell (ssh) protocol.
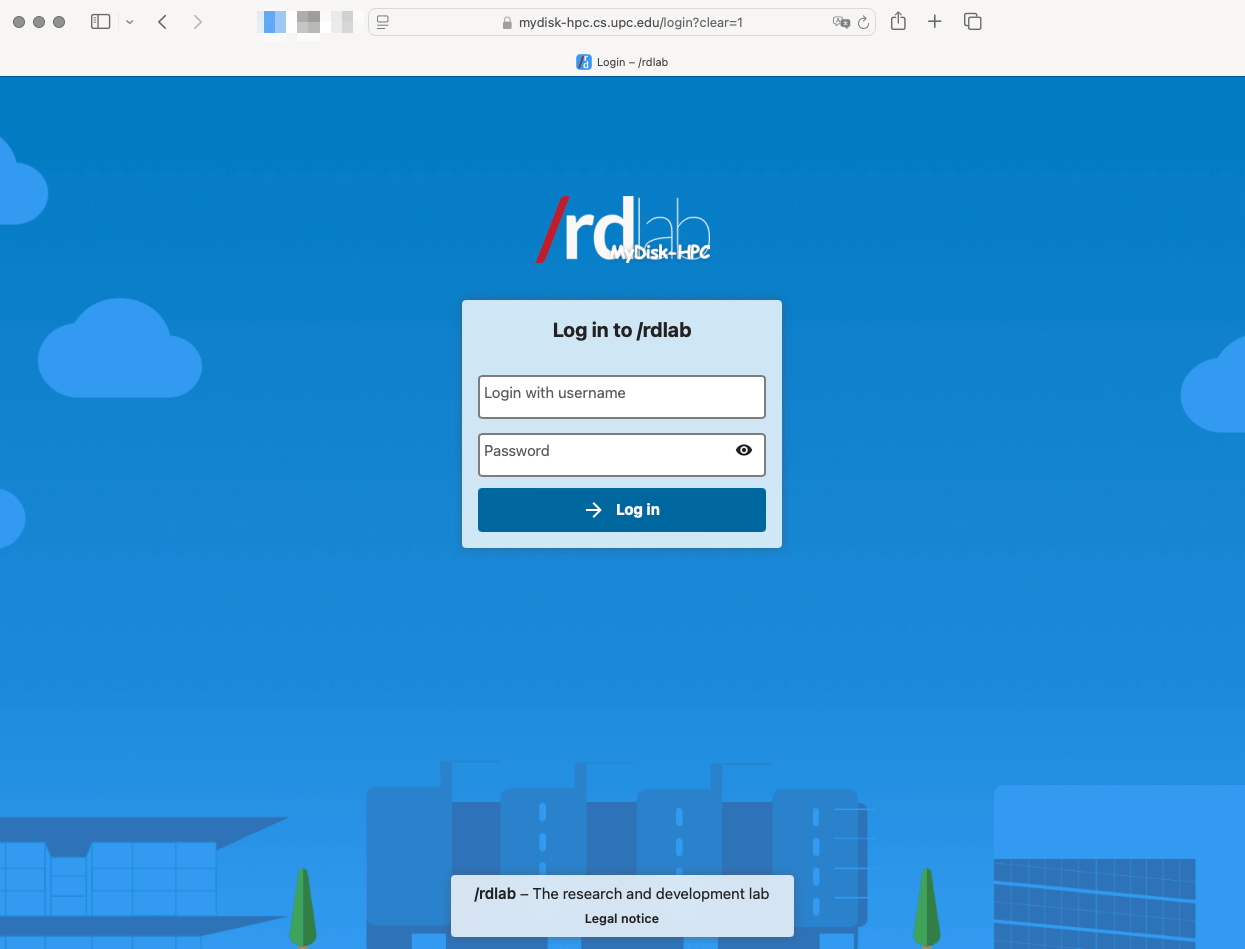
- Open a WebBrowser to https://mydisk-hpc.cs.upc.edu.
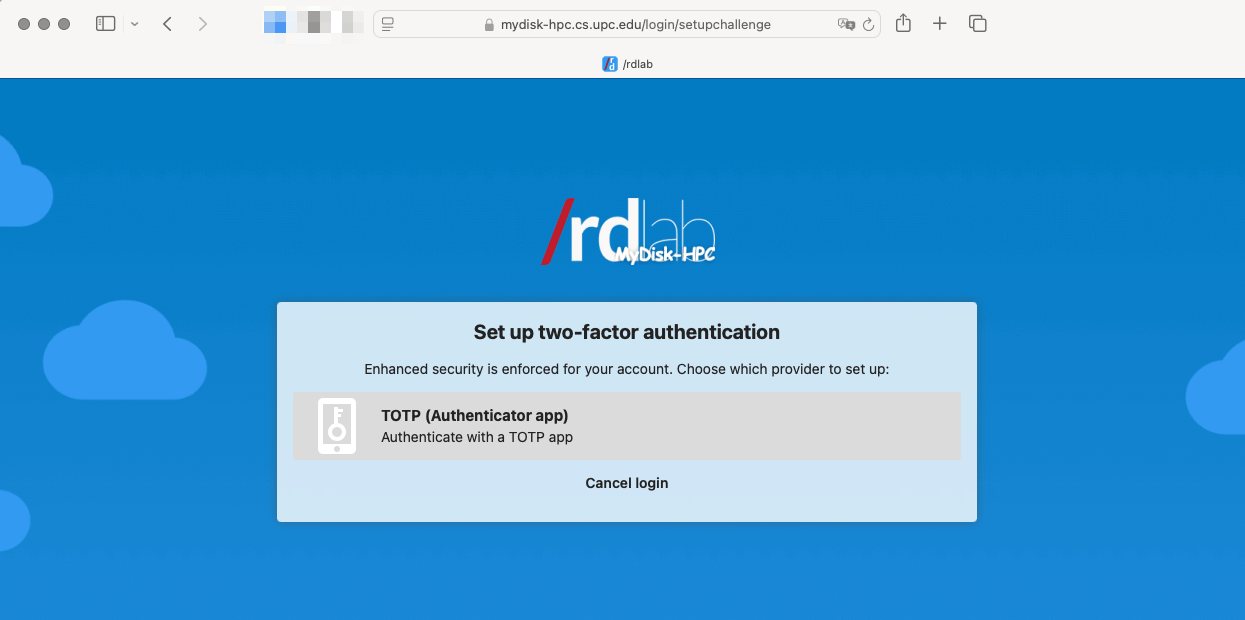
- Configure 2FA (first time only) or enter 2FA code.
- Use WebSSH (or any other available service) to connect to logincluster2.

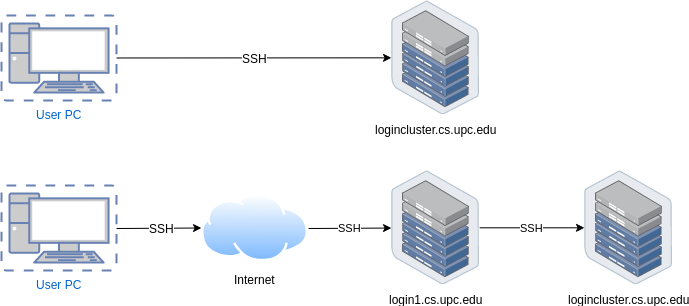
logincluster2.cs.upc.edu is "just" a bridge between the user and the HPC system is not an execution node, so you shouldn’t run any program in this system because is the less powerful server in the HPC environment. On the other hand, the system will kill all user processes in logincluster2.cs.upc.edu after about 60 minutes of execution time.
Warning: In order to access to the SLURM commands directly you may update your PATH variable, adding the route “/usr/local/slurm/bin” to it.
You should be familiar on Linux environments. You can find lots of easy tutorials and Howtos for Linux beginners.
Uploading/Downloading data to the HPC environment
You can upload and download files to/from the HPC environment using JupyterHub.
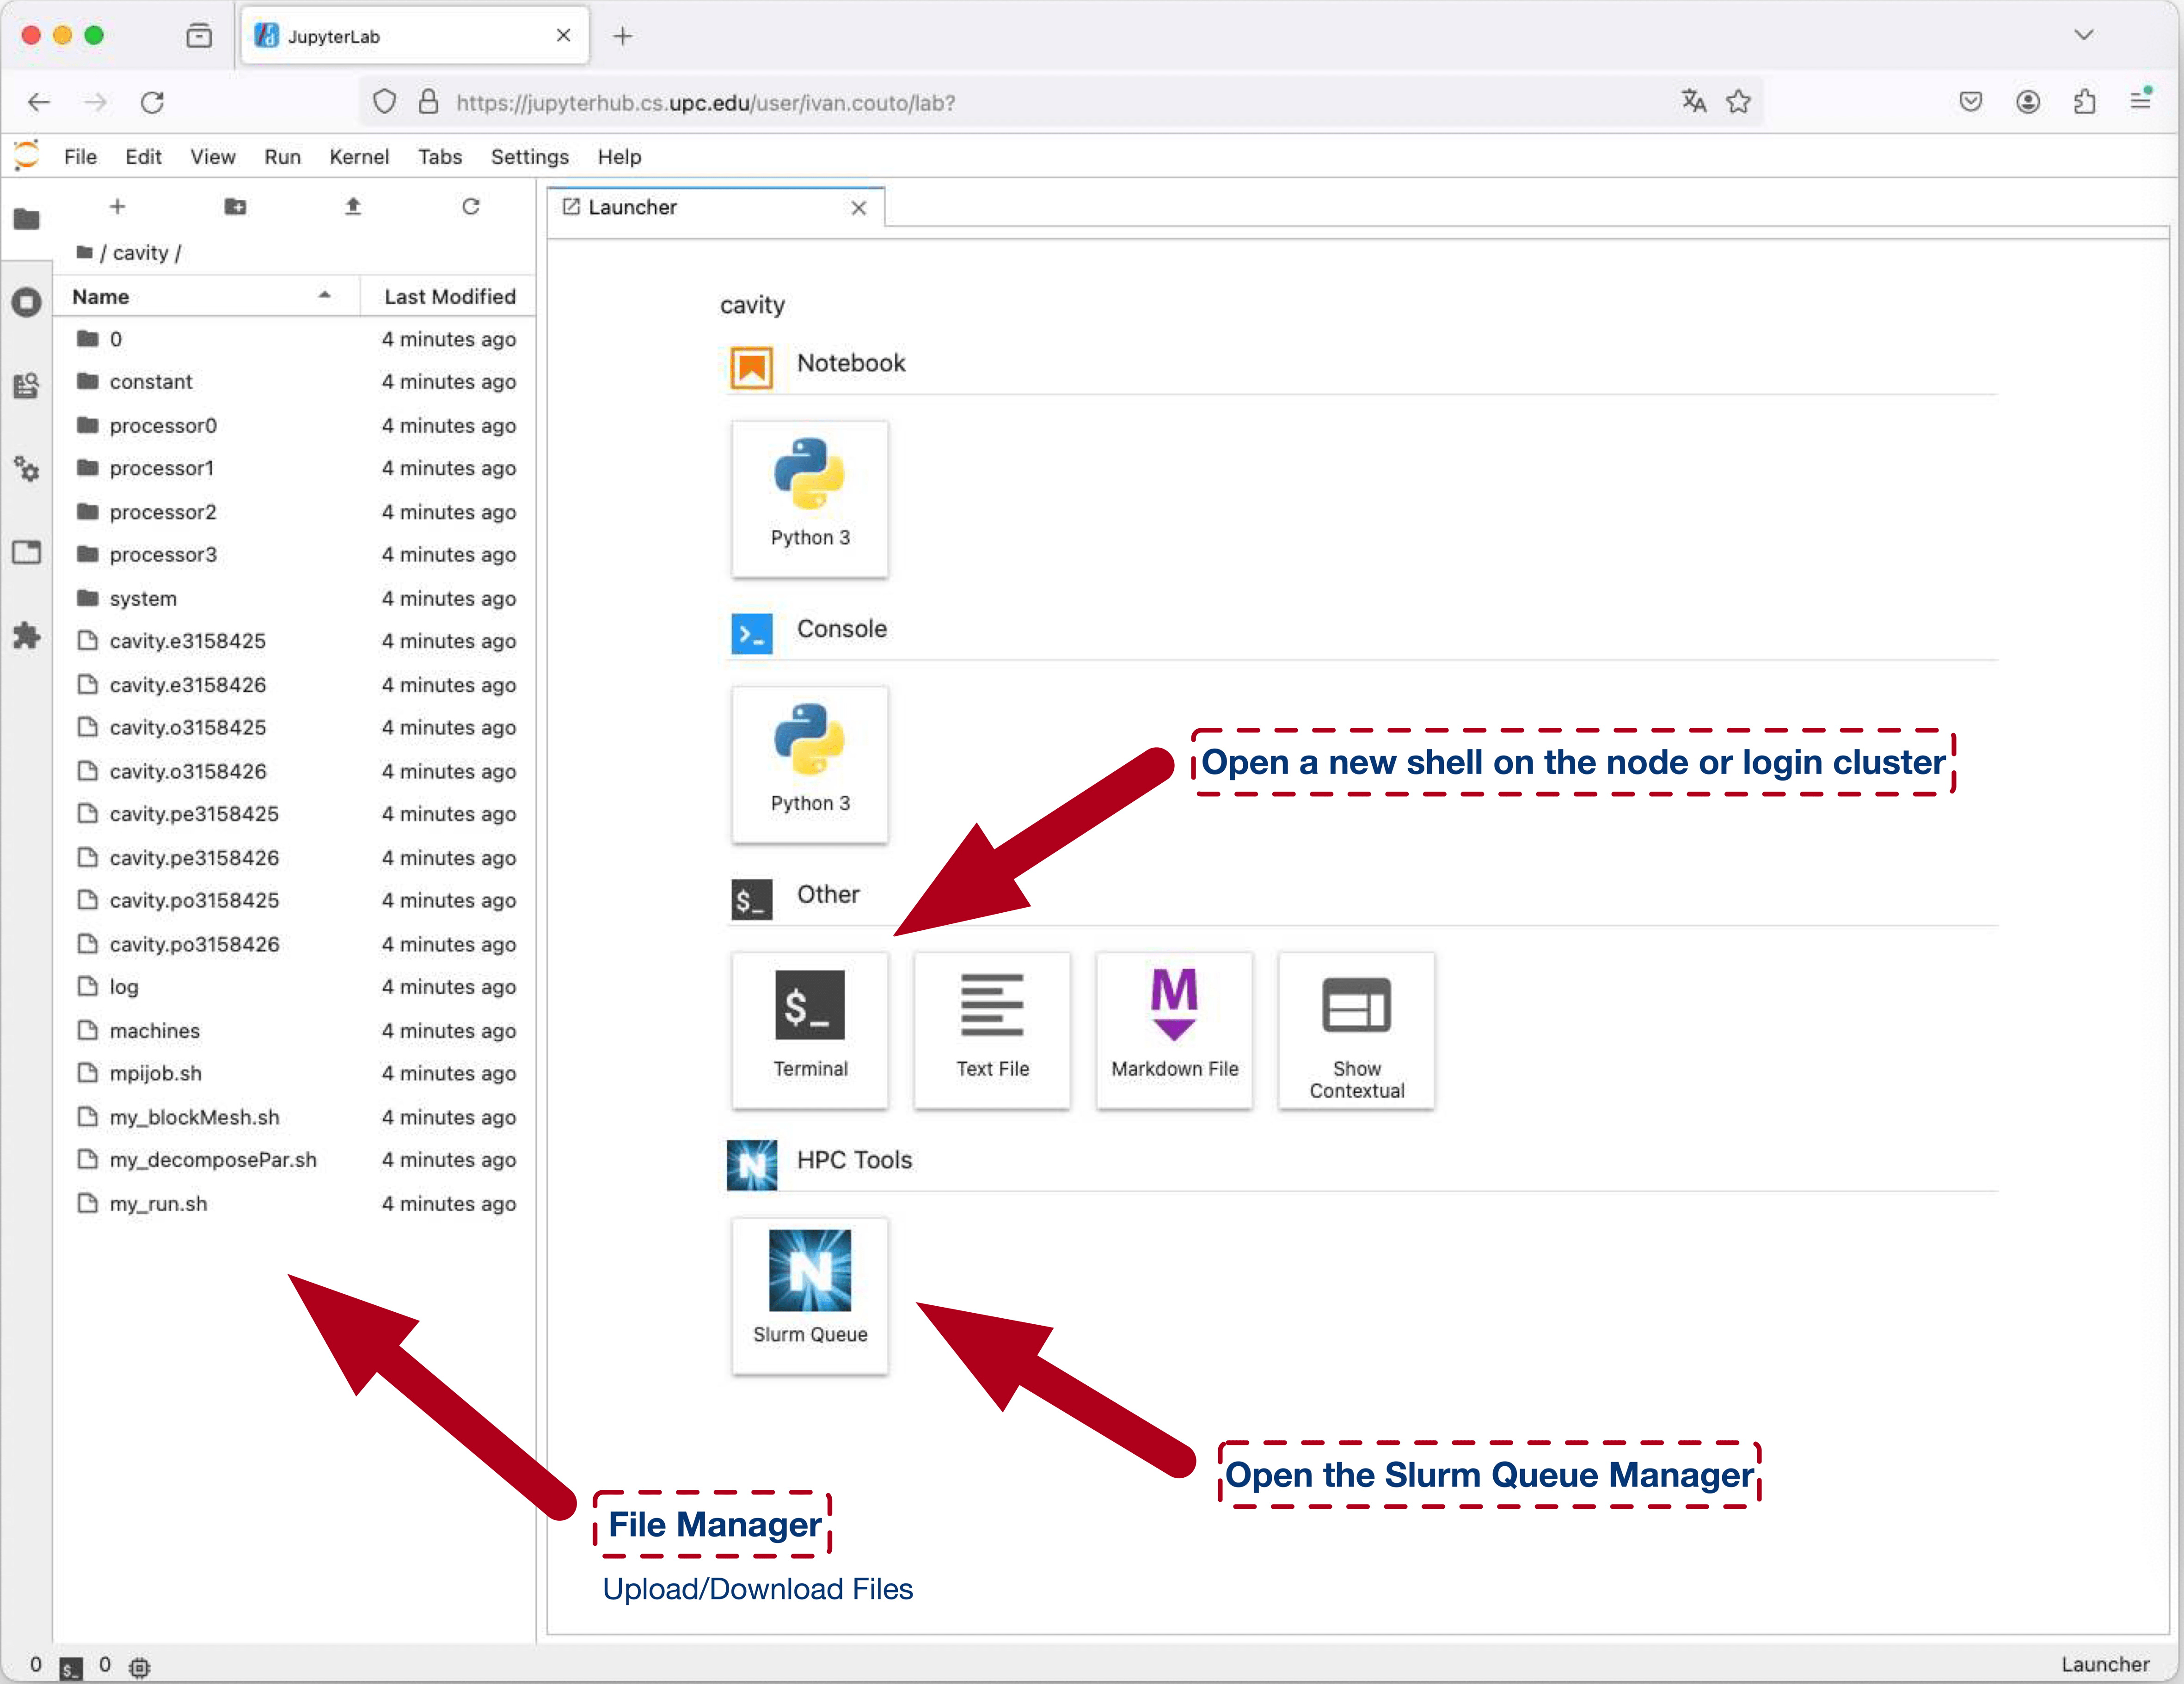
Warning:
You can create a .tar file if multiple directorys or files must be transfered between the systems.
https://alvinalexander.com/unix/edu/examples/tar.shtml
https://www.tecmint.com/18-tar-command-examples-in-linux/
My first HPC job (Hello world!)
In the next example we will create a C program and we will run it using the HPC system. For educational purposes this user job will use 1 CPU core, 1024Mbytes RAM on the short queue.
- Create a Shell script file named “helloworld.c” and copy:
#includeint main() { printf("Hello, world! \n"); sleep(60); printf("Finishing after 60 seconds waiting \n"); return 0; } - Create a Shell script file named "helloworld.sh" and copy:
#!/bin/bash -l # #SBATCH -J my-hello-world #SBATCH -o my-hello-world.”%j".out #SBATCH -e my-hello-world.”%j".err # #SBATCH --mail-user $USER@cs.upc.edu #SBATCH --mail-type=ALL # #SBATCH --mem=1024M #SBATCH -c 1 #SBATCH -p short # firstly we will compile the .c program gcc -o helloworld.exe helloworld.c # Secondly we will run the program ./helloworld.exe - Send your job to the HPC queue system:
sbatch ./helloworld.sh - Check your queue status:
squeue -u <your_username> - Wait until the queue system finds a free execution node that fits your job needs.
You can monitor “in real time” your job output through the output file (my-hello-world.out) and the error file (my-hello-world.err)
tail -f ./*.out ./*.err
Warning: If the execution nodes are “full” of user jobs or your executions time last much time, you can leave the system and you will be notified by the HPC system via email when your job execution is completed.
My first interactive job
If you need to compile or execute any program in interactive mode (never run programs in logincluster2) you can ask for a interactive shell enviroment that fits your needs in a execution node.
- Request a shell with 3 CPU cores, 1024MBytes RAM and less than 24h (short queue):
srun -p short --mem=1024M -c 3 --pty bash - Request a shell with 6 CPU cores, 16GBytes RAM and less than 24h (short queue):
srun -p short --mem=16G -c 6 --pty bash
Warning: This interactive shell will be only available if there are any free execution nodes which can fulfill your request. Otherwise you will receive and error because no interactive shell can be provided at this time because all the execution resources are currently used. Besides, you should also have enough quota available, or you will not be able to execute your interactive job.
Running GPU jobs
In order to run regular jobs on gpus, you must request the specific gpu partition, the number of gpus and optionally the type of gpu.
- List available gpu nodes with gpu names
sinfo -p gpu -o "%20N %10c %10m %25G %15E" - Sending a batch job
sbatch -p gpu --gres=gpu[:GpuName]:NumOfGpus my_job.sh
Examples
- Batch job that uses just one gpu
sbatch -p gpu --gres=gpu:1 my_job.sh - Batch job that uses one specific gpu
sbatch -p gpu --gres=gpu:k40c:1 my_job.sh
Accounting
Slurm lets you know some useful information about your queued, running and finished jobs
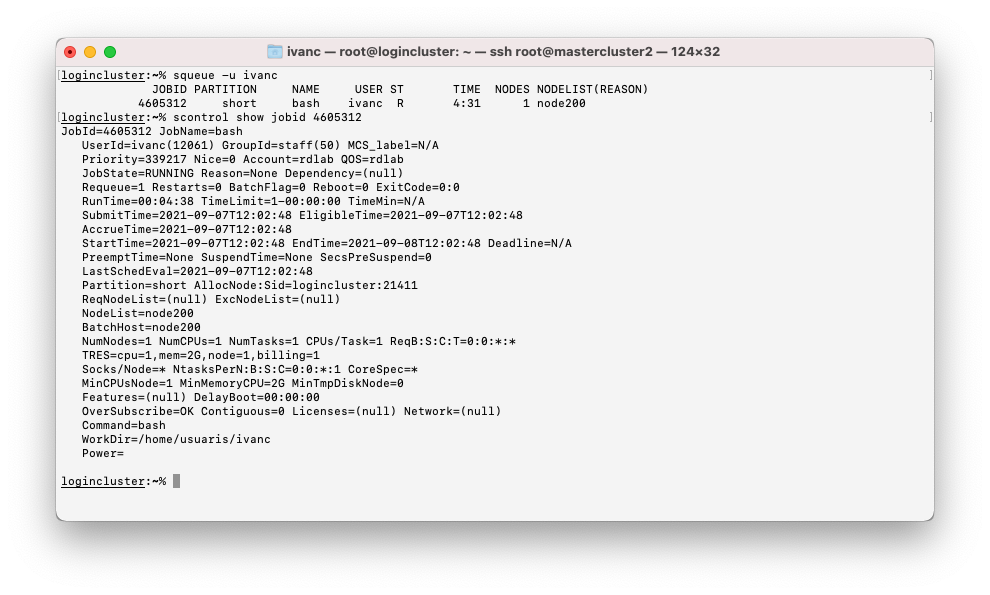
- Information about a queued or running job
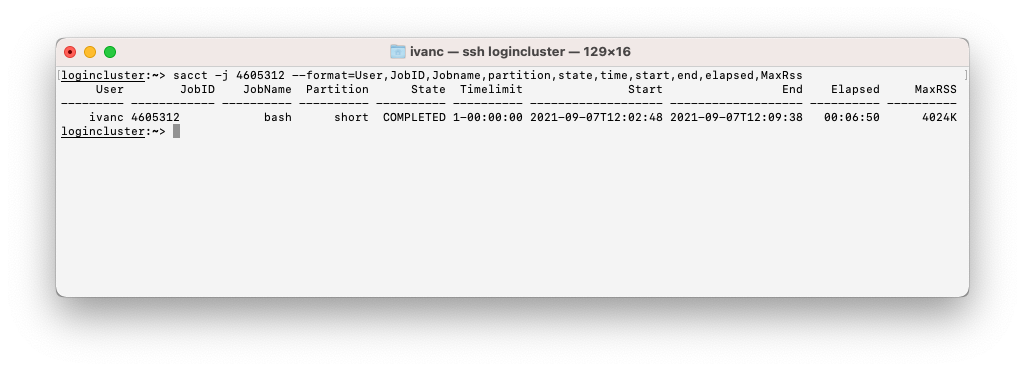
scontrol show jobid - Customizable information about queued/running/finished jobs
sacct -j jobid - You can customize the output of the sacct command with the use of the "--format" option. A comprehensive list of fields can be found at https://slurm.schedmd.com/sacct.html
- A typical sacct query with execution time (elapsed) and maximum memory usage (MaxRss)
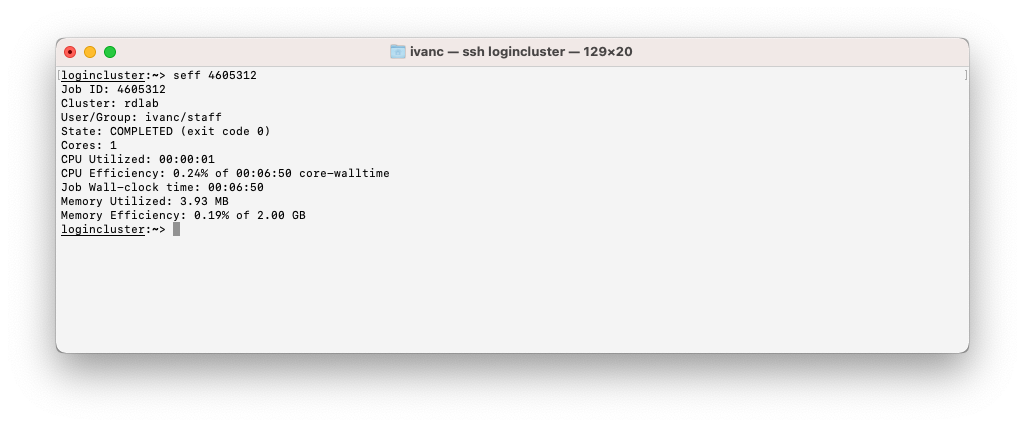
sacct -j jobid --format=User,JobID,Jobname%15,partition,state%15,time,start,end,elapsed,MaxRss - seff is an alternative command to sacct that shows the most commonly requested information in a more readable way. Notice the Memory Efficiency field that lets you know how much memory your job used / requested memory. An interesting information in order to optimize your memory quota
seff jobid
Debugging basics
- Why do my jobs don't start running?
Your resources are limited by number of cpu cores and memory quota. The cluster itself is used by several users so at a any given time there might not be enought resources to cover the needs of your jobs. The squeue command NODELIST(REASON) field shows the node(s) where a job is running or the reason why it is not beeing running if queued
- Why did my job die abruptly?
Sometimes your job ends sudently or sooner than expected. Slurm controls the execution time and the memory consumed by jobs. A job can't run for more time that the maximum time allowed by the queue (24 hours for short and 7 days for medium). In addition a job can't sue more memory than requested
sacct and seff commands report the ending state of every finished job. When a job is killed the Status filed shows the reason: OUT_OF_MEMORY for exceeding the memory reserved and TIMEOUT for exceeding the time limit of the queue
